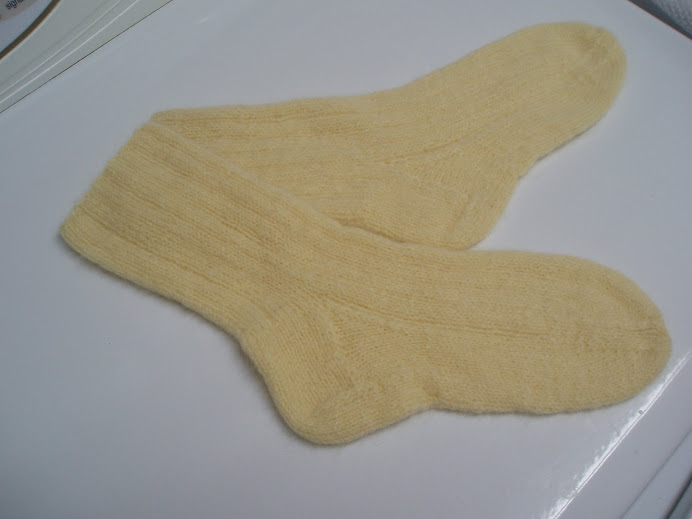
After teaching myself this method of making socks, I taught I'd share. I've tried the 2 at a time socks on one needle, and there is way too much tangling of yarns for me. However, once you get comfortable with doing one sock, you may want to venture out and try 2. If you've knitted socks on double pointed needles, you're already halfway there. For those just learning to knit socks, no problem, this method is extremely easy once you get used to manuvering the circular needle.
Materials: 1 32 - 40" circular needle size 2, 3 or 4 whatever size gives you correct gauge , markers, darning needle and tape measure
Sock yarn - fingering weight yarn, 2 skeins or approx. 400 yards.
Gauge: 7" = 1"
This is for a ladies' medium foot - I wear an 8 shoe
Cast on 56 st. onto your circular needle. Now move your st. up cable, and count 28 stitches. Pull cable up at the end of your 28 st. This divides your 56 st. in half. Okay, bring your stitches to the needle part. I knit my socks inside out, makes no difference and I find the joining of stitches is tighter. You'll see what I mean if you start the way I do.
Now, we need to start knitting in the round, so make sure your tail yarn is on the right needle or front needle. Also, make sure that your sts are not twisted. Pull out the front(right) needle and knit your first stitch pulling tightly so as not to have any gaps. Place a marker to indicate beginning of round. Knit another st. pulling yarn tightly again. Continue knitting across remaining sts. to end. You'll notice at this point that your st are hanging on the cable. To continue, push your st. so that they are on the needle part. Pull out your front needle and continue knitting across the 28 st. this is the other side your sock.
Okay, you've done your first round. I personally like to knit my first round instead of starting with the pattern.
This sock is worked in K2, P2 ribbing for the cuff and stockinette for the rest, so it's really easy to do.
Next round: K2, P2, making sure that you are pulling your first 2 st. tightly in order to avoid ladders or gaps. Continue for 2".
After you've completed your ribbing, start knitting in stockinette. This will be the leg part.
Knit every round for about 6 - 6 1/2" or desired length.
Your heel will be worked on half of your st. = 28 st. All slipped stitches will be worked purlwise.
Heel Flap: (Worked over 28 st)
Row 1: SL 1, K1, SL 1 K1 across 28 st. (Known as Eye of Partridge heel) much sturdier
Row 2: SL 1, P across
Repeat these 2 rows for 2 1/2" - 3"
Heel Turn: (SSK - slip two sts. knitwise onto right-hand needle, then insert tip of left needle in the front of the two sts and K2 tog)
Row 1: SL 1, K15 ssk, K1 turn or you can do SL 1, K15, K2tog, K1*
Row 2: SL 1, P5, P2 tog, P1 turn
Continue working rows 1 and 2 until all your sts have been worked. You will have 16 st. left on your needle.
*Note: If you do not like doing the SSK, you can K2tog instead, really does not make a difference.
Next row: K across the 16 st. This will bring you to the side of your sock. You will start the Gusset now:
Pick up 19 sts. along your side of sock. These stitches are picked up by going under your first slipped st. After you've picked up 19 st.,place a marker here. This is the end of your heel. Now knit across your instep stitches - 28 st., place another maker here. Now pick up 19 sts. along your other edge of sock. Knit half of your heel stitches, which will be 8 in this case, and pull your needle through. This is the new position of your sock. Your cable will be split at half of your instep stitches. You should have 82 st. on your needles.
You will notice that your very first marker at the beginning of cuff is now facing you. Take that marker and put it on the other side of sock to let you know that it is the beginning of round.
You will now be starting your knitting at the heel portion of sock.
Gusset Decreases:
Your heel and gusset sts will be decreased, not your instep stitches. You will always have 28 sts for the instep at this point. So, basically, you're decreasing at the end of the heel and at the beginning of the other side of the heel which are indicated by your markers, what wonderful inventions!
Ready for Decreasing: You now have to get back down to 56sts. just like when you started. You will reduce your sock by 2 sts on each decrease round.
Knit every stitch all around knitting through the back of the picked up stitches so that you do not have any holes - then -
Round 1: Knit to 3sts before your marker, K2 tog, K1, k across the instep stitches, turn to other side, k instep sts to next marker. After marker, K1, SSK, knit across remaining heel st.
Round 2: K all around, no decreases made
It helps to make a note on paper to remember where you are. Continue in this manner until you have 56 st. left total.
Foot:
You will continue to knit, for 2" shorter than your foot length. Measure your foot from the back of your heel to your longest toe. My foot measured 9" and I like my socks snug, so I make mine 6 1/2" long, then I begin the toe decreases.
Toe decreases: There are many different methods, and so far I prefer this one.
Note: You will be decreasing all around the sock, including the instep. I like to mentally divide my sock into 4 sections, each having 14 st at this point. This helps me keep track of my decreases to make sure I have an equal number all around.
Round 1: K to last 3 st, before marker, K2 tog. K1 = 13 st. Move marker
K1, SSK (beginning of your instep) turn around
K to last 3 st, before marker, K2 tog. K1 move marker (other side of instep)
K1 SSK k to end (other side of heel)
You should have 52 st. total
Knit 3 even rounds
Knit 1 decrease round, followed by 2 even rounds (twice) 6 rounds
Knit 1 decrease round, followed by 1 even round (three times) 6 rounds
Work rest in decrease rounds until you have 8 st. total left on your needles. Finish off with Kitchener method.
Instructions for Kitchener method:
With your needles in home position and having 8 st. left
K through back needle
K through front needle - pull this stitch off needle
P through front needle
P through back needle - pull this stitch off needle
K through back needle
K through front needle - pull this stitch off needle
P through front needle
P through back needle - pull this stitch off needle
Continue until all stitches have been worked
Weave your yarn through the sock and secure. You're done: now cast on for your second sock.
Hope you found this helpful. I have researched and tried different patterns and came up with this beginner one and have tried to make it as clear as possible.
Happy knitting:
Subscribe to:
Post Comments (Atom)


No comments:
Post a Comment